Showing posts with label bags. Show all posts

Tuesday, January 14, 2014

I Finished Something

one down many to go......  i got my Cargo Duffle bag finished.  it was one of the last items on my 2014 Quilty Goals list.  i had most everything cut and ready i just needed to sew.


i quilted the panels using warm and natural in the middle and duck cloth as the backing/lining.  i used duck cloth in a couple bags i made for Christmas gifts and love how it holds its shape and gives durability to the bag.


using the duck cloth does make pinning a challenge so i used Clover clips and i love them.  they worked well on this bag.


having made several bags i tend not to always follow the patterns as well as i should.  i know.  i know.  practice what i preach.  read the directions.  my lack of reading came back to bite me in the ass on this bag.  oh well.  i made the handles for this bag how i like to make handles.  using interfacing and some fusible fleece as well as nylon webbing.  i find that it turns out a really sturdy handle that doesn't stretch out as much.


putting the zipper in was fairly easy with the gusset and such but this is also where i messed up and ended up with the gusset opening being a little bit smaller then the side panels.  rather then un-sew and fix the problem i just modified it and added a few pleats to each side.  


the inside seams are bound and the duck cloth is the lining on the bag.


as you can see the bag has really nice shape and structure to it with two outside pockets which are nice.  i doubt the bag is big enough for me for a weekend getaway bag.  maybe an overnight bag.


right now i have all of my knitting in it.  it is working out great for that.  this is a bag that i will make again and yes i will read all of the directions and get the next one right.


i have also been working on an old WIP using Origins.  i have all of the blocks trimmed and the layout is ready.


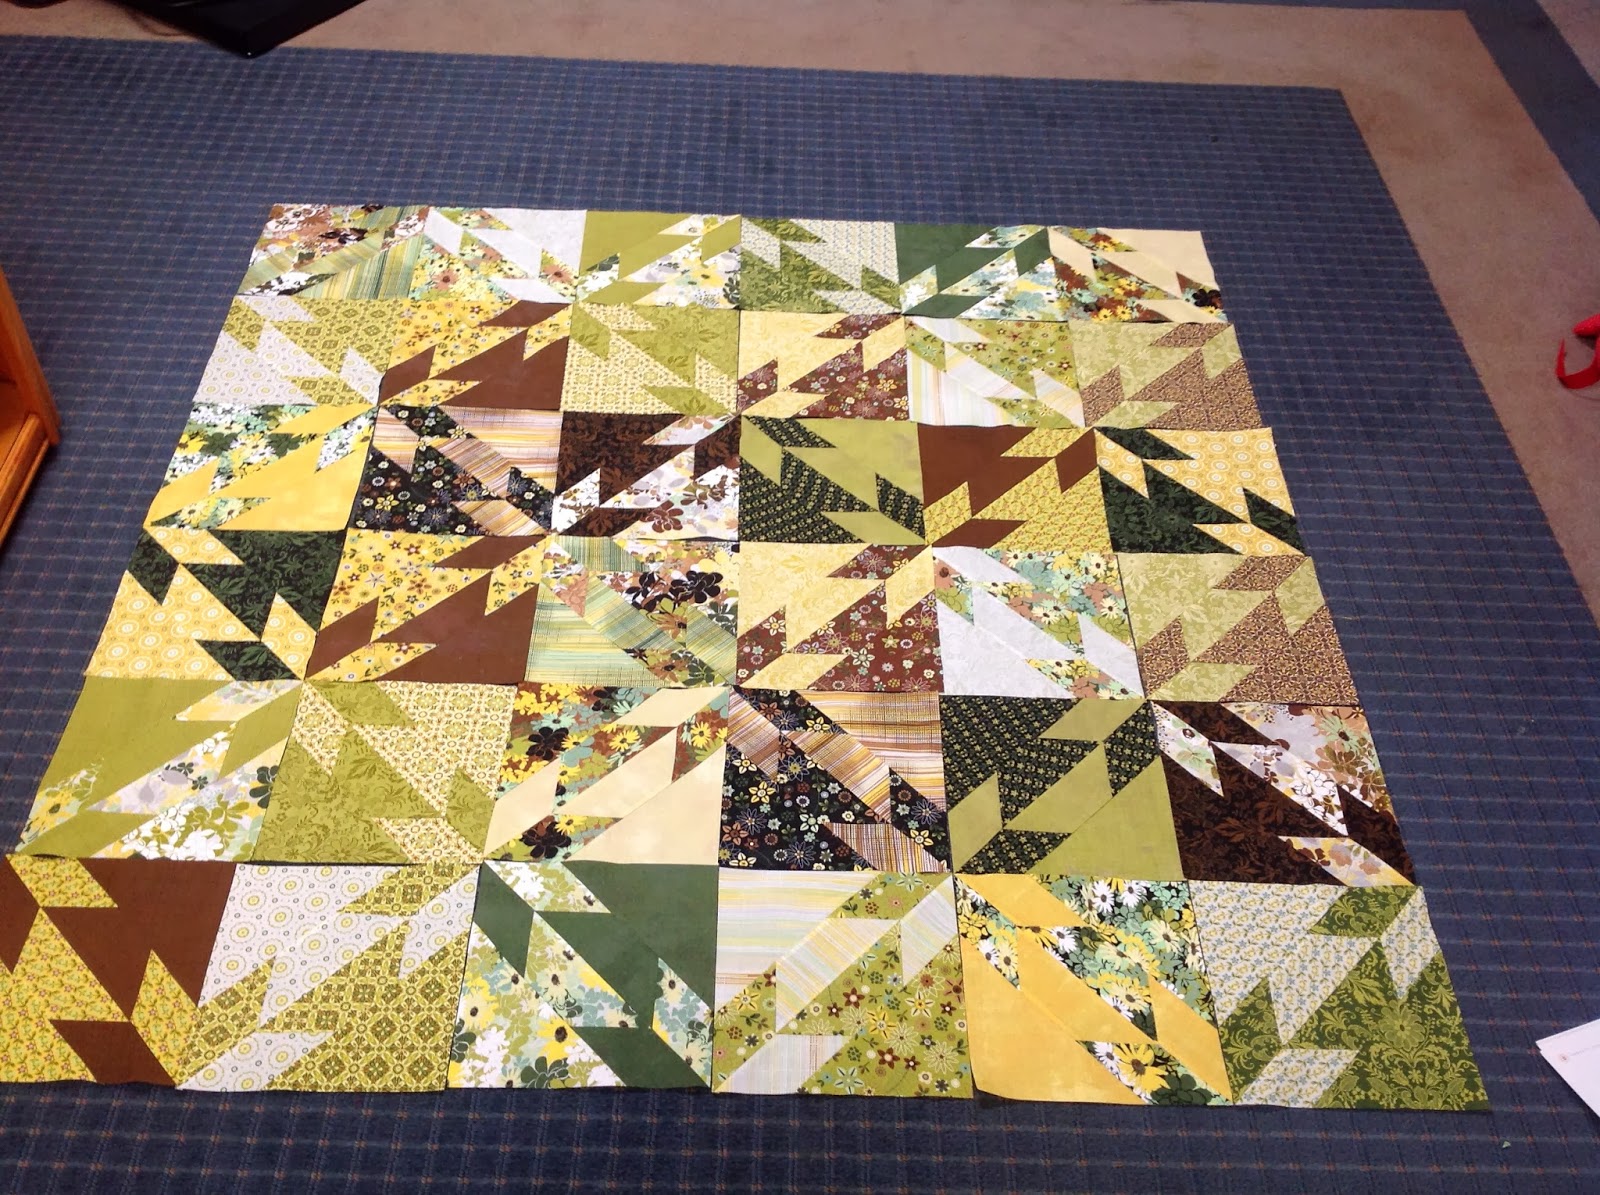
this isn't the final layout.  i did a little switching around with the help of some instagram friends (i love you gals) and my quilting buddy Denise - love you too.  so next up on my sewing list is getting the middle of this quilt sewed up.  but......  it will be awhile before i get it done.  because i am headed to....


The Big Easy

yup.  checking off another bucket-list item and taking a non-work related little vacation.  i am super excited about it.  i have heard great things about New Orleans and can't wait to experience the city for myself.  me being me and getting the most bang for my buck this trip did not just jump into my head.  it was prompted by......


Dave.  i blame him and i thank him all in the same breath.  

Dave Matthews and Tim Reynolds are playing at the historic and newly renovated Saenger Theatre for not 1 but 2 nights and yes by the grace of God i have tickets for both nights. when these shows were announced last year my wheels (aka my brain) starting turning to see what i could make happen.  i will save you the drama and just say that i made it a possibility and now i am going.  if you are a regular reader you know of my love of his music.  i love the band in concert as well however him with Tim is my favorite.  so i will escape reality for a bit because i know it will be there when i get back and i will enjoy every minute of my Dave inspired vacation.

happy sewing


Saturday, December 28, 2013

Christmas Sewing and other things

now that Christmas has been here and gone i can share some of things i sewed for gifts.  starting with a Super Tote which is a pattern from Noodlehead.  i went to a camp in October and had everything cut and ready to sew together.  i have made another one of these Super Tote bags and i blogged about it here.


i also decided to make a wristlet that coordinated with the bag.  wristlets have become one of my favorite things to make.  they are quick to sew up and so handy to have around.


for both of these projects i dug into my Make Life fabric from Sweetwater.  

i also made gift card holders for some of my friends this year.  they are a fun and quick gift to make up.  it took me a couple times to get the location of the snaps right but once i did they went together quick.


i put a Starbucks gift card in each one.

a couple years back i did a Mystery BOM from the Fat Quarter Shop.  i love the quilt and all of the blocks in it.  i ended up having enough fabric scraps leftover from the quilt to make some additional blocks that i turned into pillows for my niece's.


doesn't every little girl need a special Christmas pillow?
i think so.

at the camp in October i got the Halloween quilt on the right quilted and then bound both of these quilts.


i love the quilt on the left.  its from a pattern that is from the Missouri Quilt Company and its called Double Slice Layer Cake.  You can find the You Tube video here.  Its made with a layer cake.  

lastly, i worked on a super old WIP that i have had for years.  i had been collecting Bliss fabric for awhile and had no pattern that would use most of the fabric.  i had a few fat quarters, a Moda Candy Bar and some yardage. 


so.......
i made up my own pattern and i am very happy with how it turned out.


originally it had another row in it but it was to long so i will put that row on in the backing of the quilt.  not to shabby for making up a pattern.  at least i think its made up.  i didn't search for a pattern online i just sketched one out.

i have more to share with you all including some more City Sampler blocks that i have been working on.  now that the Holidays are over and my house is sold i am hoping that life will slow down a bit.
fingers crossed.

happy sewing

Tuesday, November 19, 2013

My New Bag

awhile back i bought some fabric with the intentions of making a bag out of it.  it was so far back that i can't even tell you if i had a pattern in mind for it or not.  i don't remember.  then somewhere along the way of Instagram i started seeing pictures of a bag by Noodlehead called the Super Tote.  it was showing up on blogs as well.  i got the pattern.  it looked so cute in all of the pictures and it looked like it would be a good size.  i couldn't resist.  again, not remembering if i had fabric in mind for the pattern or not.

then........  my brain started working again and the fabric and the pattern all came together in one magical moment.  not really a magic moment but more like a light bulb moment.  i am sure you know what i mean.

comma by moda + Super Tote = LOVE


i put pockets on both sides of the lining.  both with elastic at the top for ease of use.  making sure one of the pockets was big enough to hold my ipad.


i also added an extra smaller pocket to the lining for a pen and my phone.


lots of pins were used when assembling the bag gusset to the front and back of the bag.  i am normally anti-pins however i followed the instructions and this part of the bag construction went very smoothly.  probably because i pinned.


at this point in the process i was sure that i messed something up.  i was at the stage of 'oh crap.  time to get out the seam riper' and 'no, no i think i am doing this right'.  i proceeded with caution.  the outside of the bag made sense to me but the zipper on the lining threw me for a loop.


i wanted to make the bottom of the bag stiffer. so after constructing the bag and before i sewed the opening in the lining shut i cut a piece of double sided fusible stuff.  its by Pellon.  i marked the center of it and started the fun process of getting it through the hole and in place.


my goal was to line up the center of the Pellon with the seam in the bottom of the bag that way i would have roughly the same amount on each side of the bag and it wouldn't be wonky.  once in place i ironed the heck out of it and that sucker isn't going anywhere.


the finished bag.
the pattern allows you to use several different fabrics if you wish for the bag.  i however kept it pretty simple with mainly black on the outside.


i added a small pocket on outside of the bag that ended up being inside the exterior pocket.  an additional spot for my phone or keys or whatever.


here is the inside of the bag with all of the lovely pockets.  i love the pop of color on the inside.  
it makes me smile.


i took this bag with me on a recent trip and i really like it.  its a great size - i got all of my necessities in it and it didn't feel stuffed - its really roomy.  i have continued to use it as my everyday bag.  so sometimes forgetting the purpose or plans for something isn't always bad.  sometimes it just takes my brain awhile to get caught up with things and then great things like this happen.

happy sewing

Saturday, May 26, 2012

Bags, bags, bags.......

bags, bags, bags.....
i have been busy on various sewing projects and some of these projects have been bags.  i was a little selfish when making bags and made one for myself.

i have been wanting to make a Miranda bag out of this fabric since i got and i finally took the time to make it.

not the greatest pictures but it was dark out already by the time i got the chance to take the pictures.

i also worked on 4 custom order bags.


my customer picked out the fabric and the sizes.

they were fun to make.  3 of them were the same size and then 1 was a larger size.  these are the style of bags that i have been making and selling for a few years now.

i have custom 'annie bags' labels that i sew into each bag that i make.  when i ordered these labels the minimum quantity i could order was 250.  i never thought i would use them all.  however, in making these 4 bags i used the last of my labels.  a little mind boggling that i have made and sold 250 bags.  i guess its time to order some more.

i have other projects that i have been working on so check back soon to see what else has been in the works.

happy sewing

Sunday, July 31, 2011

Sisters Bag

ok, so this is my 3rd attempt at this post. 1st it posted last week without pics. 2nd i re-did it this morning & went to post it & the words were gone. grrrrrr.................. i am not loving Blogger right now.
each year i go to Sisters for their Outdoor Quilt Show. i go with with a group of friends & i have a rule that you must make a bag to take to Sisters. so this is my bag for our 2011 trip.

the fabric is Prince Charming by Tula Pink. laminate on the bottom and regular cotton on the top.


i used the Teardrop Bag pattern from this Amy Butler book. i mainly followed the pattern with the exception of the pockets on the inside. i did those a little different.


i love how the 2 frogs show up on the sides of the bag. this was my 2nd attempt at this bag. the 1st time i had the frog in the middle & with the pleat you couldn't see him. so i cut a 2nd bag & like this much better.


a shot of the inside of my bag. i used a magnetic closure on the bag. i like the kind that are sewin in on the wrong side of the fabric. with these you are not pulling at the fabric each time you open your bag.


so there you have it. my 2011 Sisters bag. i got a lot of comments on it while i was at Sisters. people liked it because of the colors & shape. then they realized that there were frogs on it & liked it even more.


i use the bag often & really enjoy it. i have a couple more posts from my trip to Sisters that i hope to get up this week.


on another note. the quilt top that i made for Venezie Designs was featured here in a blog post. also, you should go check out Sarah's blog Confessions of a Fabric Addict & see all of the quilts that were made for the H2H Challenge.

Sunday, April 10, 2011

A Good Cause & A Bag

awhile back i did a post about using our sewing talents for a good cause.

with that said i would like to let you know about a fabulous cause that is right up our alley. my friend Sarah who blogs over at Confessions of a Fabric Addict has put together a challenge for all of us. its called Hands 2 Help Charity Quilt Challenge.

PLEASE. PLEASE. PLEASE.

go visit her blog & learn about this amazing cause & how you can participate.


life if getting back to normal for me - again. i have lots of stuff to share with everyone, even stuff from quilt camp which was at the beginning of March. i am beginning with my favorite thing that i started at that camp but only recently finished.

the zipper bag as i call it.

i bought this pattern last summer on my annual trip to Sister's. the shop had one made up & it was love at first sight for me. needless to say i came home put the pattern away & sort of forgot about it. off & on i would come across it looking through my patterns. i would begin to read the instructions & put it away again. then i was digging through my fabric & the light bulb in my head went on.


this fabric + this pattern = wonderful


the pattern is No. 106 The Bijou Traveler by Serendipity Studio


the fabric is Montana Modern from Benartex


once i had this figured out it was time to study the pattern. i normally read through a bag pattern once or twice before i make it. i have made a lot of bags & a lot of the time the basic construction is similar. not the case with this one. this one had a big zipper, a grommet & didn't go together the way i normally make bags. the reading continued. i probably read the pattern about 10 times before i cut the fabric as i did not have room for error. the pattern is well written i just didn't want to screw up the bag.


i went to camp with all of the pieces and parts cut & ready to go. at this point i can't remember how long it took me to make it. it was the last thing i grabbed going out the door when i got the call that my SIL was in labor. i took it because so many other campers were eyeing it. when i left camp i had the short ends bound on the inside & just needed to finish binding the long curved top on the inside. i finished that last weekend & took the bag with me on my trip last week to New Mexico.


on one of the sides there is a pocket that is divided in the middle. the flap has a grommet in it so your headphones can come through it & your music player is safe inside. the flap/pocket closes with Velcro. the other side of the bag has one big pocket. it too closes with Velcro & is a great spot to stash your boarding pass & other essentials. zipper pulls on each end of the bag. the zipper wasn't as bad to put in as i thought it was going to be. i just read, re-read & read some more to get it clear in my mind.
the inside has pockets along both sides which you can make as large or as small as you want to. yes, that is a tennis ball that you see & no i do not play tennis. it works great for a back or neck massage just about anywhere.
it is a very large & spacious bag. great for traveling.

i will be making this bag again. i am sure it will go a little quicker then this one since i have one already under my belt.